
Convert text to image, image to 3D video and much more using Stable Diffusion on your local machine!
Hey friends! In this post we’ll see how to use Stable Diffusion to generate 3D videos from any image by adding depth to the image using Stable Diffusion.
Stable Diffusion is a text to image model released by Stability AI, which we can run on our local machine also!
Lets see how to setup Stable Diffusion on our local machine.
Install supporting softwares
1. Install Python 3.10.6 – https://www.python.org/downloads/release/python-3106/
2. Install Git – https://git-scm.com/downloads
3. Create a directory to store the project, and inside that directory run – git clone https://github.com/AUTOMATIC1111/stable-diffusion-webui.git
The above step 3 will create ‘stable-diffusion-webui’ directory and it will be used for storing our models and launching the web ui.
Download Model
Go to https://huggingface.co/runwayml/stable-diffusion-v1-5/tree/main and download – v1-5-pruned-emaonly.ckpt file.
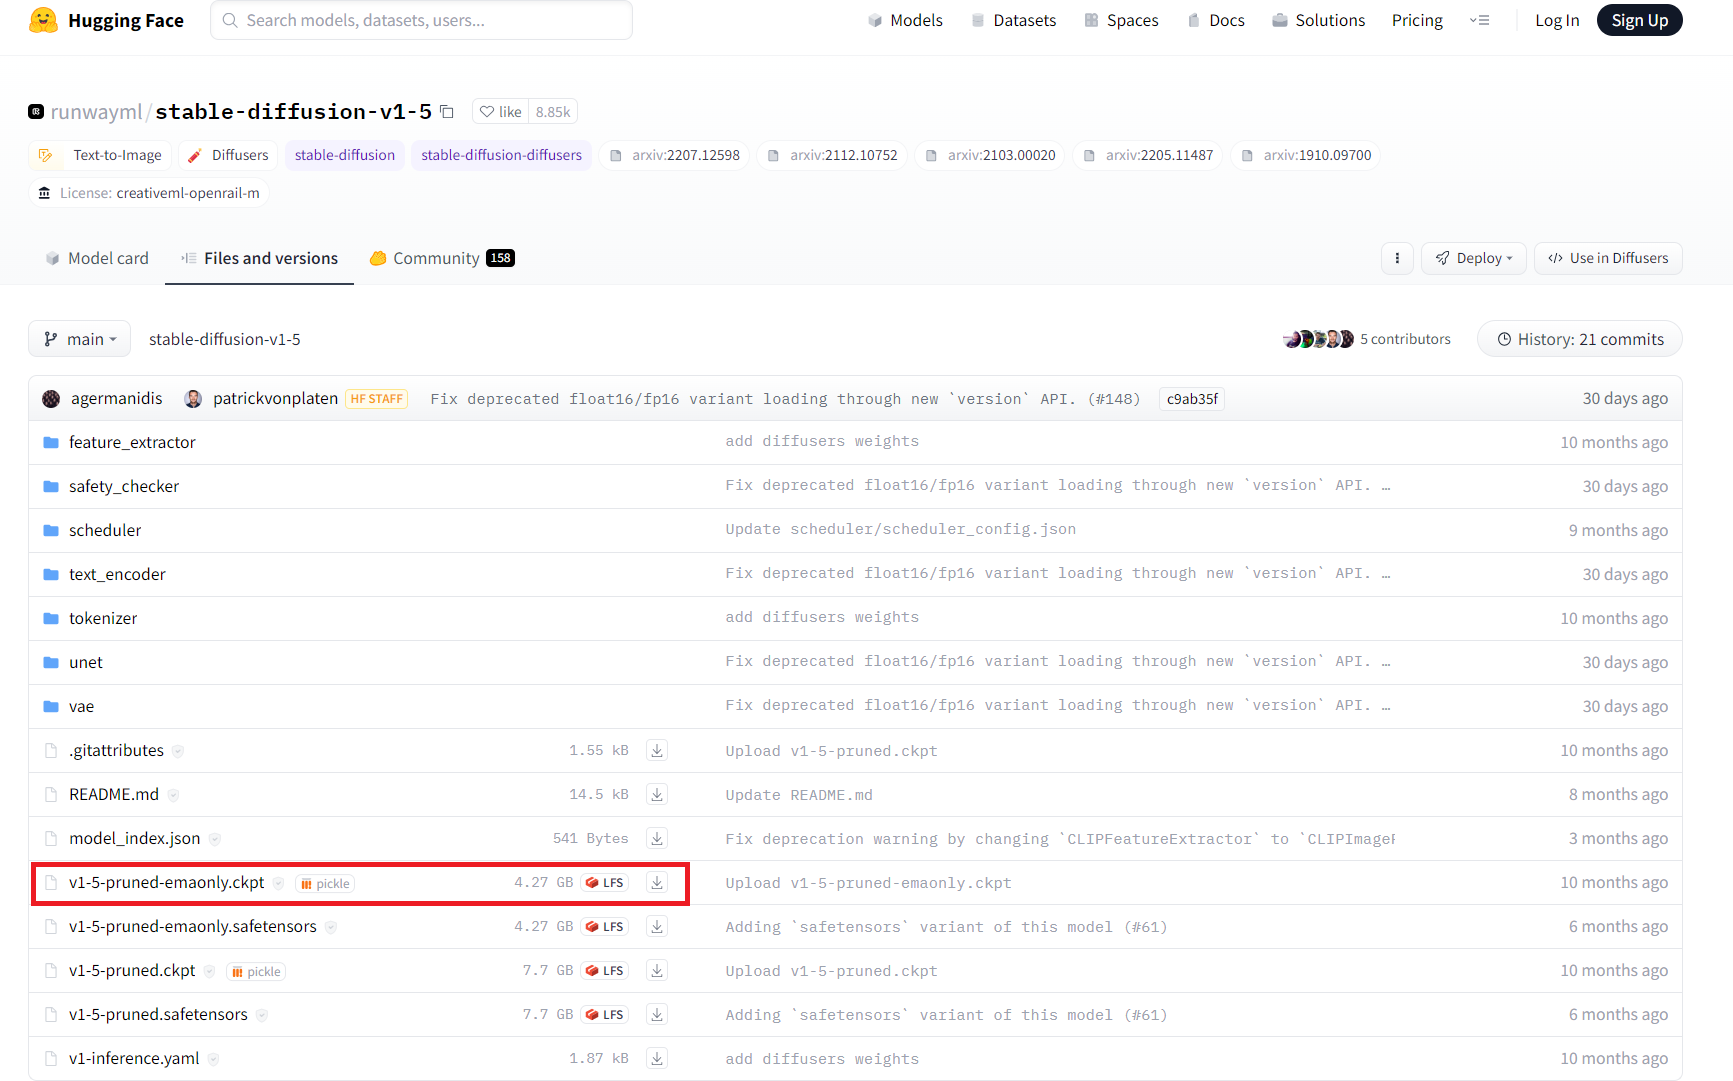
Keep the downloaded file inside:-
stable-diffusion-webui\models\Stable-diffusion\
Configure webui-user.bat file
Ensure that webui-user.bat contains the below entries:-
@echo off

set PYTHON="PATH_TO_YOUR_python.exe"
set GIT=
set VENV_DIR=
set COMMANDLINE_ARGS=--theme dark
git pull
call webui.bat
Add the path to your python.exe. Setting the theme is optional, I like dark theme much better than the default one.
Add git pull, so it would always keep the project updated.
Launch the webui-user.bat file. It should start the server and may take some time. If all goes well it will prompt the URL: http://127.0.0.1:7860/, where the web ui is running.
Text to Image
The Web UI is intuitive. First you need to select the model(in case you have multiple models), here we have chosen v1-5-pruned-emaonly.ckpt under Stable Diffusion checkpoint dropdown.
Then you can give some prompts on txt2img tab for which you want to generate an image, it may take some time to generate the image based on the CPU/GPU of your machine.
Give negative prompts as well for having better control over the desired image.
Eg:-
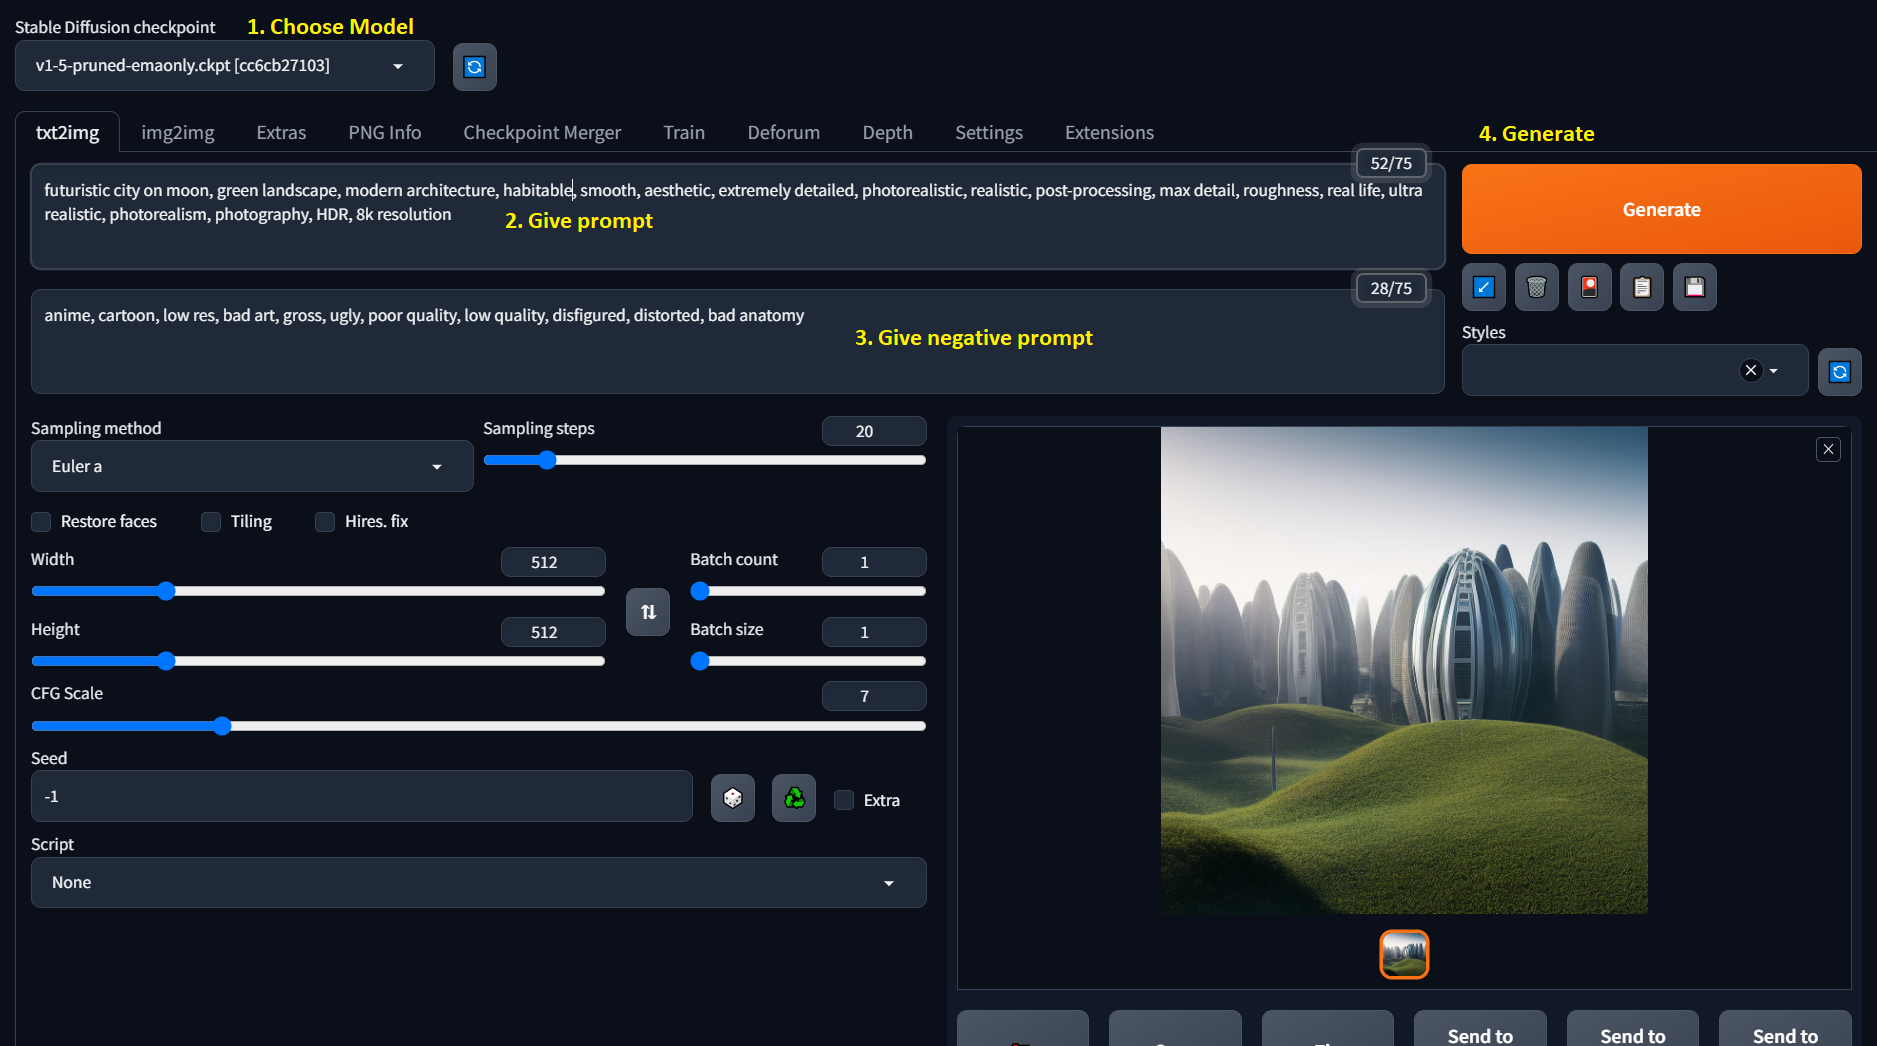
Image to 3D video
Now lets head to the more interesting part – How to convert an image to 3D Video?
The magic happens by adding depth to the image.
Navigate to Extensions tab on web ui and then Install from URL and provide the URL – https://github.com/thygate/stable-diffusion-webui-depthmap-script and click Install.
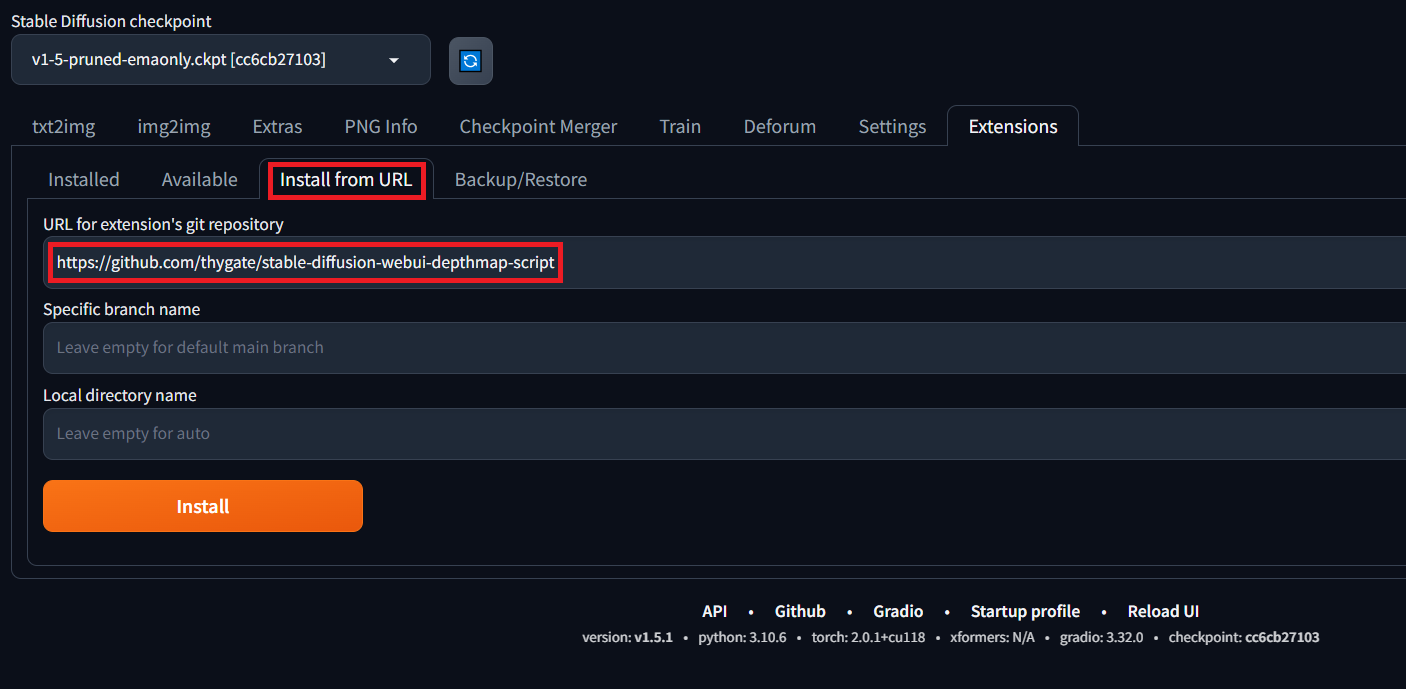
Restart the web ui once the installation is complete. Installation may take some time depending on your machine.
After restart you should see a new “Depth” tab. Head on to the Depth tab and upload your image as below:-
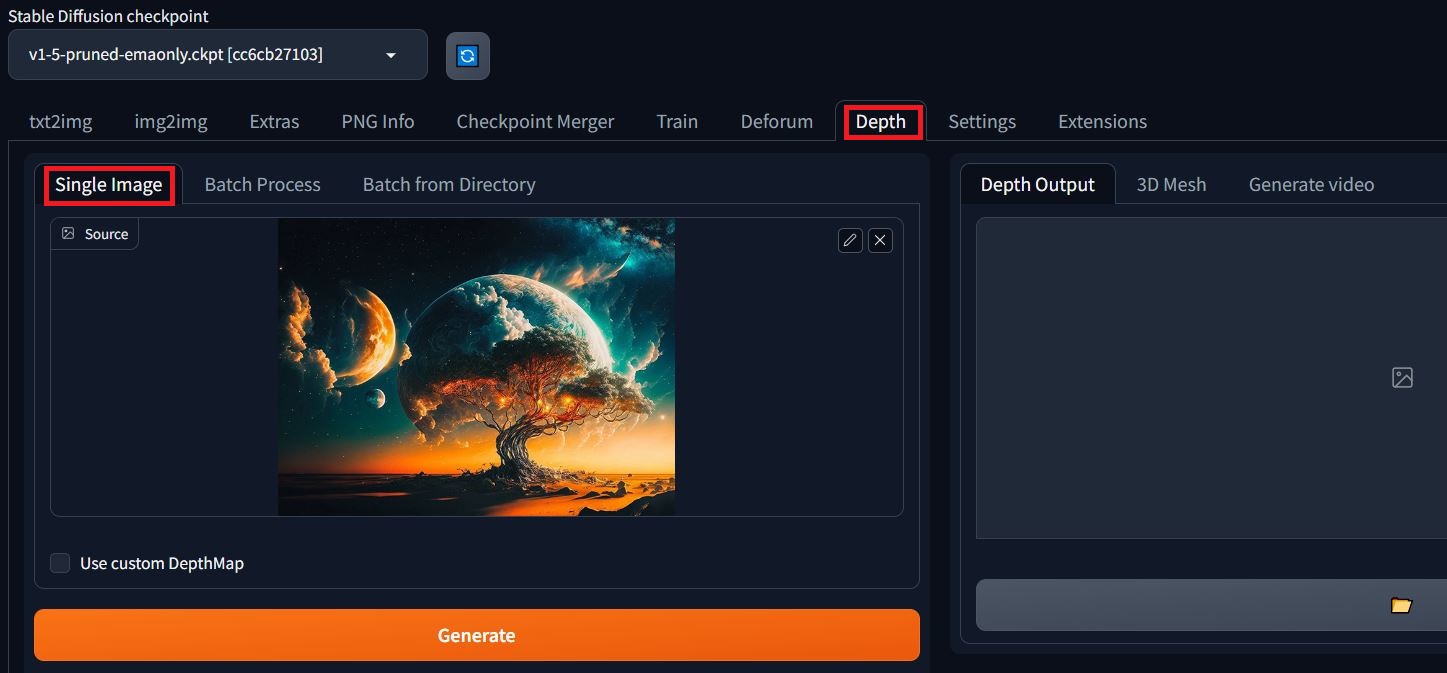
Don’t click on Generate just yet!
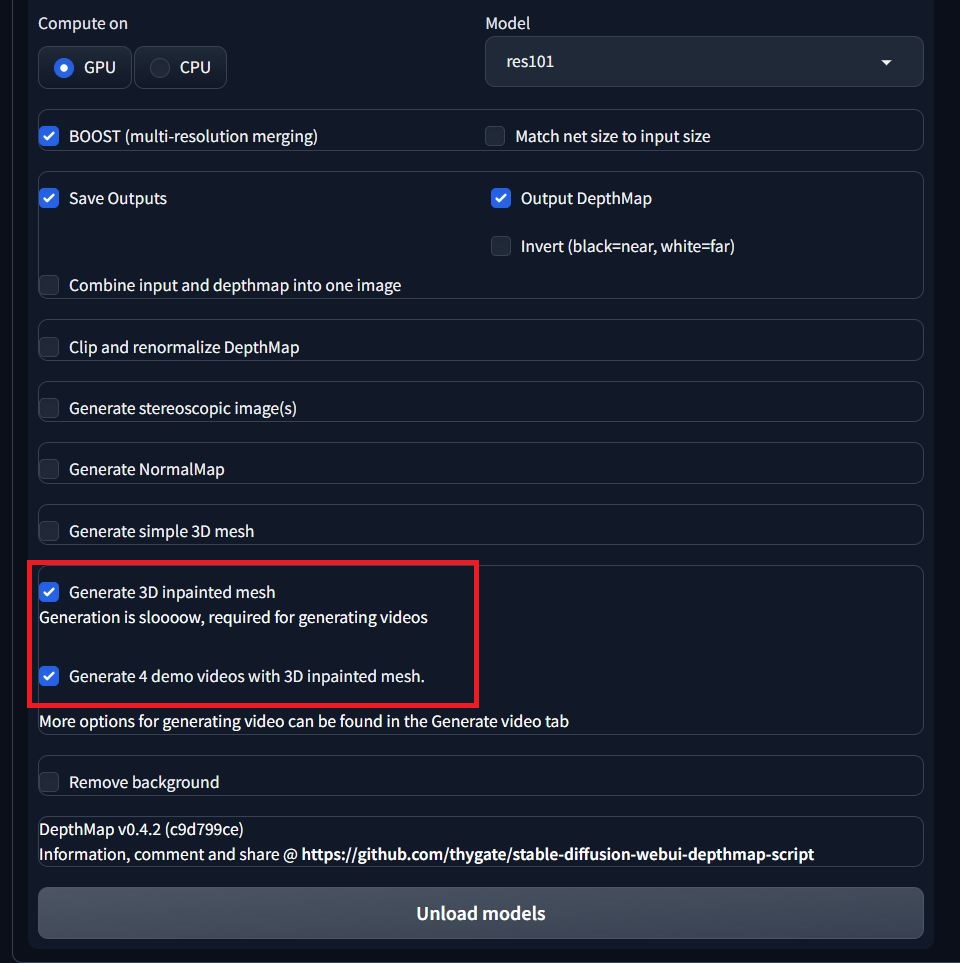
Choose 3D impainted mesh as below from settings, it will generate 4 videos for you using the image, it adds depth to the image by filling the missing details in the depth.
Click on generate and go and grab a coffee, no seriously, it will take time. Once done it will generate a 3D video for you!
Troubleshooting
While starting the web ui, you might encounter – “Torch is not able to use GPU; add –skip-torch-cuda-test to COMMANDLINE_ARGS”, if this happens, add
--skip-torch-cuda-test to COMMANDLINE_ARGS in webui-user.bat file.
If you get RuntimeError: “LayerNormKernelImpl” not implemented for ‘Half’, add --precision full --no-half to COMMANDLINE_ARGS in webui-user.bat file.
For any other issue, do checkout the troubleshooting guide.
My COMMANDLINE_ARGS in webui-user.bat file looked like this after changes:- set COMMANDLINE_ARGS=--skip-torch-cuda-test --precision full --no-half --theme dark


